Processing Pay On-Demand Payments
Using the Pay On-Demand feature, you can pay employees in real time without having to wait for an ACH transaction. This process uses pay cards to pay employees off-cycle for instant payment. The most common uses for this feature are:
| • | Paying someone quickly for hours missed |
| • | Paying a terminated employee's wages on the same day they are terminated |
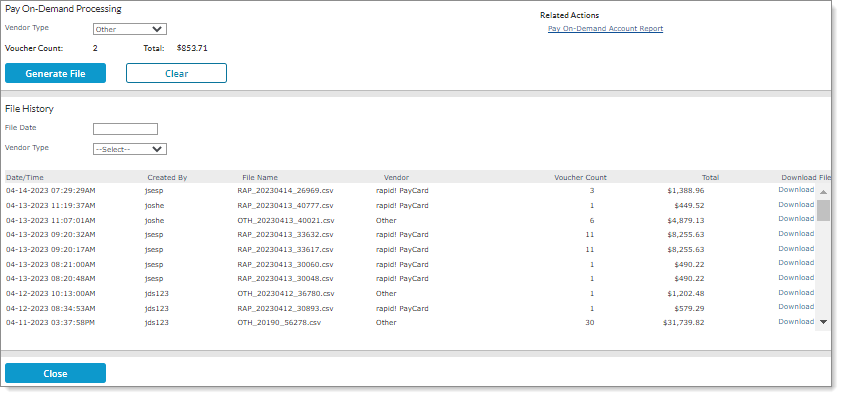
To generate a file for processing payments, use the Pay On-Demand Processing, which is available on the Operations|Action menu. For example:
Note: Only service providers can run pay on-demand files to pay employees. However, worksite managers are also allowed to set up pay on-demand accounts and process pay on-demand payrolls.
Using the Pay On-Demand Feature
Perform the following tasks in order when you are ready to use the Pay On-Demand feature:
|
Task/Guide |
Description |
|---|---|
|
Use the Pay On-Demand Account panel on the Employee Details form to store employees' account information for pay on-demand processing. |
|
|
Payroll Setup Guide |
Create a manual payroll to use for pay on-demand processing. |
|
Select the Pay On-Demand option on the Payroll Options form to pay employees on-demand through a manual payroll, where the system places the funding information in a file format for the pay on-demand vendor. |
|
|
Add employees with active Pay On-Demand Account on Payroll Control form |
When a manual payroll is set to Pay On-Demand, only employees with an active pay on-demand account display in the list when you select an Employee in the third panel on the Payroll Control form. (This also applies when selecting employees using the Quick Load option.) |
|
Payroll Processing Guide |
Process the manual payroll. |
|
Use the Pay On-Demand Processing form to generate the pay information in a file that can be uploaded to a vendor. |
|
|
Provide the vendor with the generated file |
Clients are responsible for transferring the generated file to the vendor. |
Setting Up Employee's Account Information
Enter the employees' account information for pay on-demand processing in the Pay On-Demand Account panel on the Deposit tab in the Employee Details form. For example:
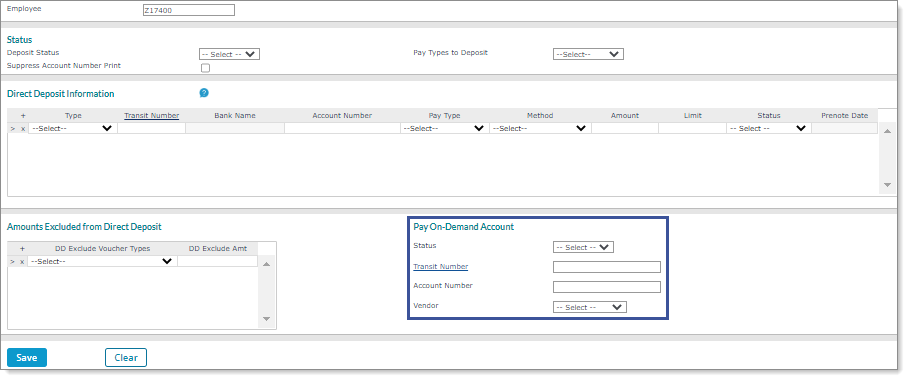
Note: An employee might also have this pay card information set up in the Direct Deposit Information panel. However, if they need to use this pay card for Pay On-Demand payments, you also need to enter the account information in the Pay On-Demand Account panel. (The system only uses the account information entered in the Direct Deposit Information panel for ACH transactions.)
When you set the pay on-demand account Status to Active, after you enter a Transit Number and move to the Account Number field, the system automatically displays the Vendor associated with that transit number. In this example, the transit number is associated with the rapid! PayCard vendor:
![]()
Note: In addition to the Pathward transit number (124085244), the system also pre-populates the Vendor field with rapid! PayCard if you use the Greendot transit number (124303162).
Note the following:
| • | Employees are only allowed one pay on-demand account where these types of funds will be deposited. |
| • | You can only use a pay on-demand account when the payroll is marked as Manual in the payroll options. (The system ignores this account for any other payroll type.). |
| • | If you complete some of the fields but not all of them and click Save, the following error message displays, "You must complete the Pay On-Demand Account setup on the direct deposit section." Click OK to continue. |
| • | The system records changes made to the pay on-demand account information in the audit log. |
| • | Payrolls set to Pay On-Demandignore the settings in the Amounts Excluded from Direct Deposit panel. |
Setting Field Security for Pay On-Demand Account Panel Fields
In addition, you can set field security for the fields in the Pay On-Demand Account panel by doing the following:
| 1. | Open the User Roles form on the System|Change menu and select the user role. |
| 2. | Select Field in the EMPLOYEE.PER*MAINT.DEPOSIT process ID row. The Field Security Maintenance form opens. |
| 3. | Click Add and select the Pay On-Demand Account panel fields, which begin with "POD," then click Accept. The fields display in the Field Security Maintenance form. For example: |
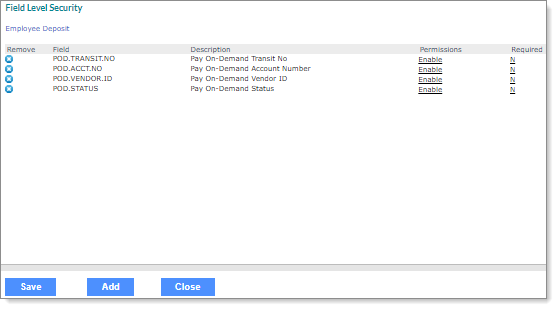
| 4. | Click N in the Required column to set the field security to Y. |
Note: You can also set field permissions to Enable, Disable, or Hidden on the employee record. (When set to Hidden, the Manager field does not display.)
| 5. | Click Save, then click Save in the User Roles form. |
Setting Up Payroll
Set up employee on-demand payments by selecting the Pay On-Demand field on the Payroll Options form. For example:
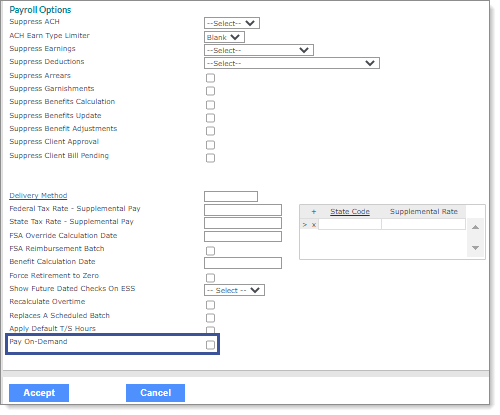
Note: To access the Payroll Options form, select Options on the Actions menu in the Payroll Control form.
Selecting Pay On-Demand allows you to pay employees on-demand through a manual payroll, where the system places the funding information in a file format for the pay on-demand vendor.
Note: Manual payrolls set to Pay On-Demanddo not pay employees using the ACH process.
Note the following when using Pay On-Demand:
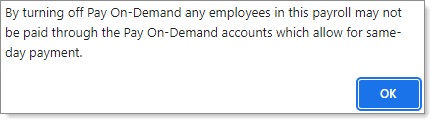
| • | If you save a manual payroll with Pay On-Demand enabled and then later disable it, the following warning displays: |
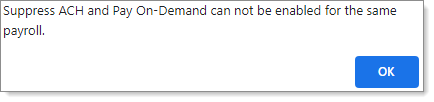
| • | If you select Suppress ACH with Pay On-Demand selected, the following error message displays: |
Note: This message also displays if you create a manual payroll with Pay On-Demand selected and then apply a Payroll Option Template with Suppress ACH selected within a timesheet. The error message displays and the system does not apply the Payroll Option Template.
Before Initiating Pay On-Demand Processing
When you're setting up a manual Pay On-Demand payroll, it's important to note the following:
| • | If you enter employees who do not have a pay on-demand account in their employee record before setting the payroll to Pay On-Demand on the Payroll Options form and click Save, the following error message displays: |
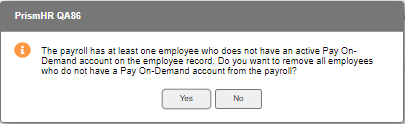
In this situation, make a selection as follows:
| • | Yes: Employees without an active pay on-demand account are removed from the payroll, then you can click Save again and the payroll will save. |
| • | No: Employees without an active pay on-demand account are not removed, but you cannot save the payroll. At this point, you must either disable Pay On-Demand or manually remove these employees from the payroll. |
In addition, if you try to disable the Pay On-Demand field on the Payroll Options form after payroll calculation completes, this field is dimmed and you cannot make this change.
| • | If you apply a Payroll Option Template that is set to Suppress ACH to a manual Pay On-Demand payroll and click Save, the following error message displays: |
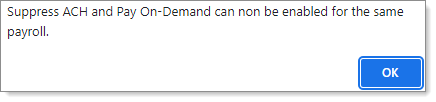
Click OK to continue, then select a non-ACH Payroll Option Template.
Working with the Pay Date
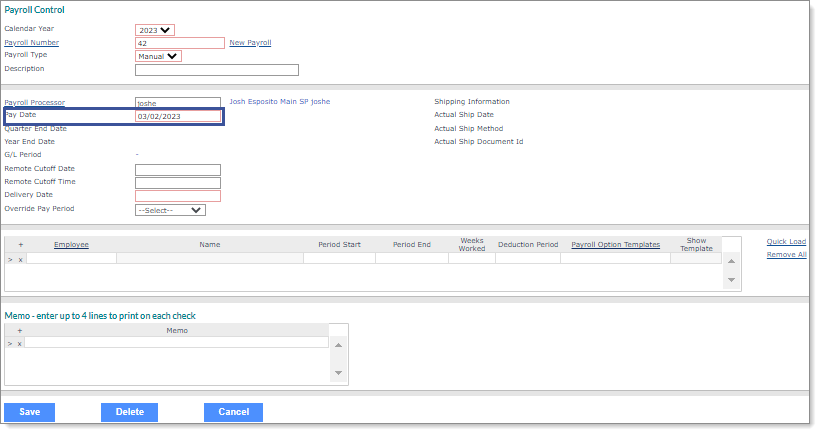
When you set a manual payroll to Pay On-Demand, the system automatically sets the Pay Date to the current date since the employee will be paid today (instant payment). For example:
Adding Employees with Active Pay On-Demand Account
When a manual payroll is set to Pay On-Demand, only employees with an active pay on-demand account display in the list when you select an Employee in the third panel on the Payroll Control form. (This also applies when selecting employees using the Quick Load option.)
Note: If you enter an Employee who does not have an active pay on-demand account an error message displays, "Employee <xxxxx> must have an active Pay On-Demand account to be added to a Pay On-Demand payroll."
Note the following:
| • | If you try to change that automated Pay Date the system displays a warning, "This is a Pay On-Demand payroll so the Pay Date must be the current date." (Click OK to continue.) |
| • | If you enter or select a Pay Date that is not the current date and then select the Pay On-Demand field on the Payroll Options form the system displays a warning, "Pay On-Demand payroll must be paid using the current date. By selecting this option the pay date is updated to today." (Click OK to continue.) |
After you click Accept and return to the Payroll Control form, the system automatically changes the Pay Date to the current date.
Reviewing Pay On-Demand Employee Status
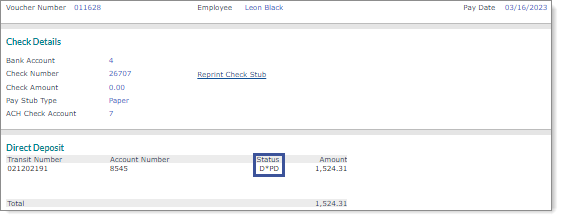
After you process a pay on-demand payroll, D*PD displays in the Status column on the Banking tab in the Payroll Voucher form for employees whose direct deposit account is set to Pay On-Demand in their payroll control record. For example:
Reviewing the Number of Pay On-Demand Checks Paid
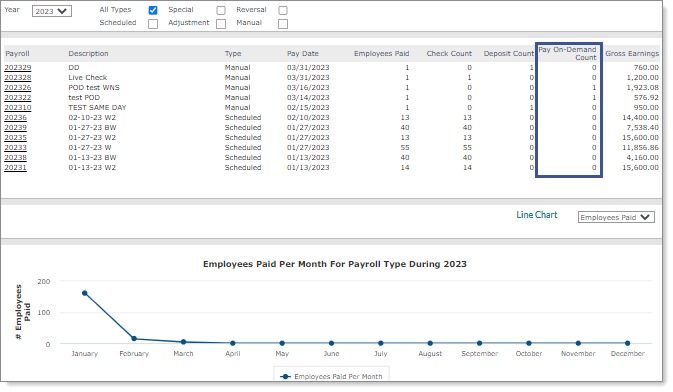
You can review the number of checks paid in payrolls that use the Pay On-Demand feature (that is, the payroll type is Manual and the vouchers have the D*PD status) in the Pay On-Demand Count column. This column displays on the Payroll History form, which is available on the Payroll|View menu. For example:
Generating the Pay On-Demand File
After you complete the tasks listed above, use the Pay On-Demand Processing form to generate the pay information in a file that can be uploaded to a vendor. (Note: Clients are responsible for transferring the generated file to the vendor.)
Note: After generating the file, it remains in the File History, so you can reference this information if there is an issue with the file transfer or if you need to review what was included in the last file.
To generate a file that contains employees set to Pay On-Demand:
| 1. | Select Pay On-Demand Processing from the Operations|Action menu. |
Note the following:
| • | When you access the Pay On-Demand Processing form, the system locks the form to ensure that other users cannot process the file at the same time. After you click Close, the system unlocks the form and the following message displays: |
| • | If the Pay On-Demand Processing form is locked when you access it, you can clear the lock by selecting Pay On-Demand Clear Lock on the Operations|Change menu. |
| 2. | Generate a file that contains the pay on-demand information by selecting the Vendor Type. After you generate this file, you can transfer it to the selected vendor. (The system adds the file to the File History panel.) |
Note the following:
| • | If the selected Vendor Type does not have any additional pay on-demand payrolls available for processing the following error message displays, "There are no Pay On-Demand vouchers to be processed for the vendor <vendor name>." Click OK to continue. |
| • | Select the rapid! PayCard vendor type to process a pay on-demand file for the rapid! Paycard vendor, so the file format is set to match the vendor's expected output. |
| • | Select the Other vendor type to process a pay on-demand file for a vendor who is not supported, which provides access to information that you can relay to your vendor. |
| 3. | The system displays the Voucher Count and the Total amount (the net pay value of all the vouchers) for the selected vendor type. |
| 4. | Click Generate File. The system stores the file in the File History panel and a Download File link displays, where you can do the following: |
| • | Download File link: Click this link to open a browser window that displays a link to the file in the bottom-left corner, then click that link to open the file in .csv format. This file contains data that you need to provide to the pay card vendor. |
| • | File History panel: After generating the file, you can review the data again that displays in this panel. (After selecting the sort criteria, the vendor's most-recent files display.) |
Searching for a File
After generating a file that you can upload to its vendor, you can view the file's data again by searching for it using the sort criteria in the File History panel:
| • | File Date: Enter or select the date when the file was run. |
| • | Vendor Type: Select the vendor type. (See step 1, above, for more information about the Vendor Type.) |
Note: The system stores files for up to six months.
After making the sort criteria selections, the table displays up to 100 of the vendor's most-recent files. (If there are more than 100 files, you can use the paging options to scroll through the rest of the files.)
The table displays the following information:
| • | Date/Time: Date and time the file was initially run |
| • | Created By: User name of the user who generated the file |
| • | File Name: Unique name of the file |
| • | Vendor: Name of the vendor selected when the file was created |
| • | Voucher Count: Number of vouchers included in the file |
| • | Total: Net total of the vouchers listed in the table |
| • | File: Link that opens the file |
Viewing Employees Set Up with Pay On-Demand Accounts
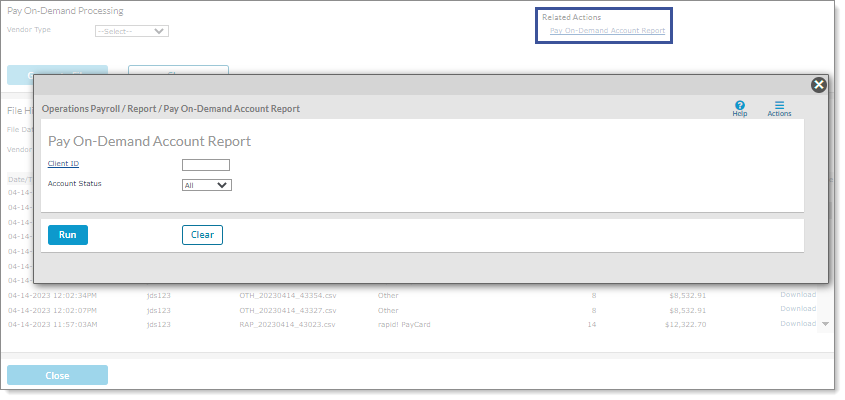
You can view which employees have pay on-demand accounts and which of those accounts are active or inactive on the Pay On-Demand Account Report form.
To access this form, select the Pay On-Demand Account Report link, which displays on the Pay On-Demand Processing form, under the Related Actions header. (You can also access this report on the Operations|Payroll menu.) For example:
Note the following:
| • | This form uses Client Access Group security. |
| • | Service providers and worksite managers can only view employees who they are allowed to access. |
| • | The Pay On-Demand Account Report link does not display for users whose roles are set to INQUIRY or DENY for the Pay On-Demand Account Report form. |
| • | If you view the Pay On-Demand Account Report before clicking Generate File but after selecting a Vendor Type in the Pay On-Demand Processing form the file generation fails and the following error message displays, "There were no Pay On-Demand vouchers to be processed for <vendor>," even if there are vouchers available to process. |
| • | If you re-select the Vendor Type and generate the file again without viewing the Pay On-Demand Account Report, the system completes the process. |
Voiding Pay On-Demand Payments
Employees who are paid using pay on-demand processing have an invoice amount that is debited on the ACH file. However, if you void the pay on-demand voucher, the invoice amount displays as a credit on the ACH file.
Note the following:
| • | If you run the pay on-demand process (that is, you generate a file) and then you complete a void, no changes occur in the history file. |
| • | If you do not generate a file and a void occurs, then the system does not include the voucher in the next file creation. |
